Canopy
Sliding Canopy
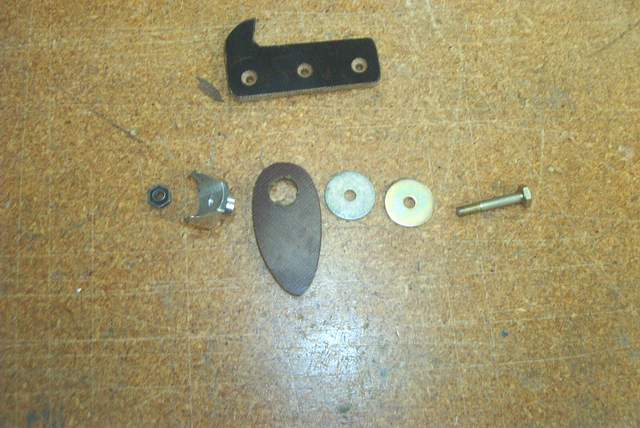
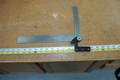
This picture shows the parts of a canopy latch mechanism that will keep your slider from sliding all of the way back to the aft stop. It's useful when you're flying solo and don't want to unstrap and reach waaay back to retrieve the canopy.
No rods, buttons, or anything to do except the normal sliding motion of the canopy is required. It's a one-hand, no-brain operation.
Notice that I said it would keep your slider from sliding all of the way to the aft end of the track. I didn't say that it would keep it from moving forward… because it won't. But the prop blast and the tail low attitude of our planes make that a non-issue.
These parts are from an RV-8, but the concept should easily adapt to a Rocket slider. The "movie" frames below show how it works, and I can vouch that it works well (on RV-8's anyway). Sorry, I couldn't get any pics of this mechanism actually on a plane. You'll have to use a bit of imagination to envision it.


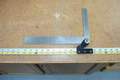
The first frame show the canopy in the "closed" position. The egg-shaped latch is just swinging freely. Imagine that the right side of the picture is the forward end of the canopy.
The following frames show that as the canopy slides aft, the egg-shaped latch encounters the latch block and slides freely past. Then when the canopy is moved forward, the latch again slides freely past the block. STOP RIGHT THERE!!! Now, move the canopy aft until the egg engages the block (frame 7 above). The canopy will stay right there until you move it forward enough to get the egg off of the block. Then the whole process starts all over again.
It works great, it's cheap, it's damn near fool proof. You'll have to modify the parts as needed to fit the Rocket slider, but if an RV-8 builder can do it, you can too. ;-)
If you want to order one, you can contact Mike Zeller at 812-985-5883 or 985-5888. Price $30.Flopper canopy
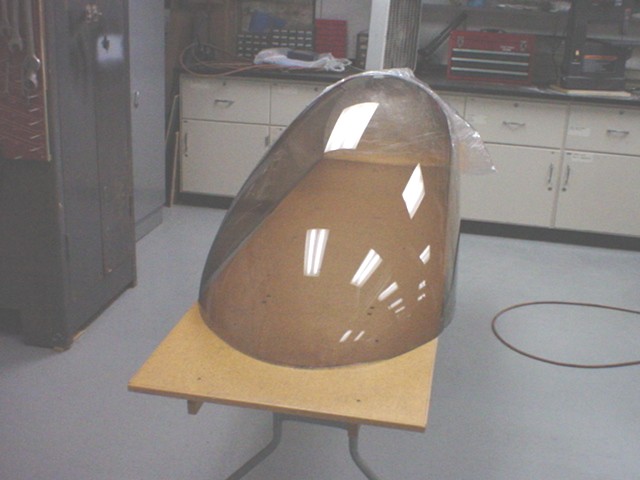

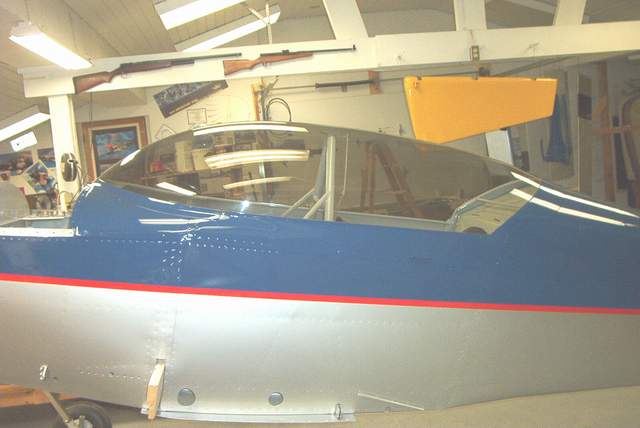
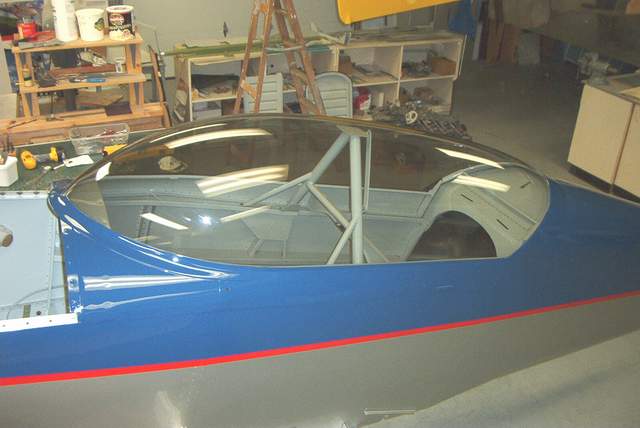
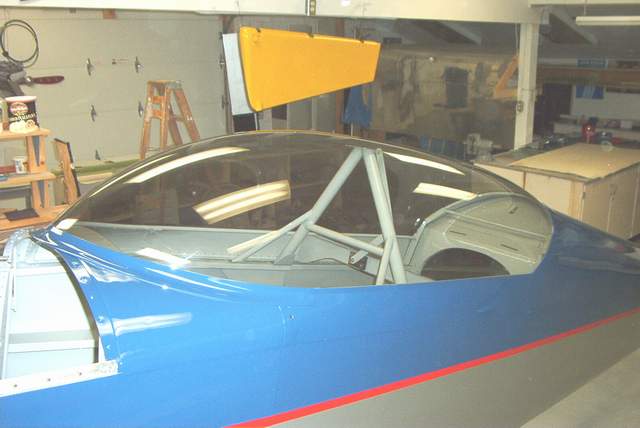
Spring 2002: I received my prototype canopy from Todd Silver last week. It looks great! Todd made the bubble to standard Rocket flopper specs and shipped it to me to make sure it will fit properly. Even though this bubble is only the prototype, notice how optically straight it is judging by the reflections of the fluorescent lights. Trust me, it looks good. I could probably use it it I needed to. The only reason not to use it is that it is made of thinner plexi than I want.
Unlike Van's bubble's which have the base still attached, Todd's canopy came pre-trimmed to almost exactly what I needed. I probably won't have to spend more than a few minutes trimming this bubble to get a perfect fit. Very cool!
I will probably ask Todd to add an inch or so of length and height to the production bubble. This bubble will fit any standard Rocket flopper, so if you need one, don't
hesitate to call Todd and have him make you one. I can't' give an exact cost since I bit the bullet for the prototype, but Todd's prices are VERY attractive and he
gets my firm recommendation. I don't have any business relationship with Todd but here's his contact info anyway:
Todd's custom canopies:
Todd's Canopies mailto:BSILVER05@aol.com 8-1-2002:


 9-10-02: Modifications were necessary to get my custom bubble to fit the canopy
frame. I had to cut the frame everywhere. More on this as it
develops, although from what I've seen on other Rocket projects, cutting the
frame to fit is standard practice.
9-10-02: Modifications were necessary to get my custom bubble to fit the canopy
frame. I had to cut the frame everywhere. More on this as it
develops, although from what I've seen on other Rocket projects, cutting the
frame to fit is standard practice.
Installing the bubble: Lot's of info about handling the plexi is available elsewhere, so I won't cover too much here. I used a 4" or bigger cutoff wheel in my Milwaukee angle grinder to cut the plexi. You can use a little sissy cutoff wheel in your Dremel tool if you must, but it will take 10 times as long.
Buy some plexiglas bits and save yourself $600. 'Nuf said.
Work on the bubble when it's warm in the shop. Plexi doesn't like the cold.
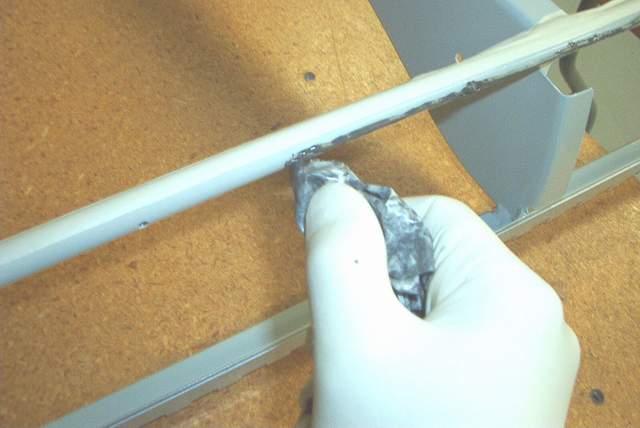
I like to glue the bubble to the frame to eliminate annoying squeaks. It also makes the canopy noticeably stiffer. You can use silicone caulk (but not where paint will go), or ProSeal. I chose ProSeal because I'm addicted to the smell and mess.
 You can put your MIXED ProSeal into a baggie, cut a small hole in the end of the
baggie, and squeeze out a nice bead with a little practice. It's much less
messy this way.
You can put your MIXED ProSeal into a baggie, cut a small hole in the end of the
baggie, and squeeze out a nice bead with a little practice. It's much less
messy this way.
 The canopy is ProSealed to the frame. Clecoes are to hold everything until
the ProSeal sets. The ProSeal will cushion the plexi a bit, but the main
reason I use it here is to prevent canopy squeaks. Did I mention that it
also makes the canopy substantially stiffer?
The canopy is ProSealed to the frame. Clecoes are to hold everything until
the ProSeal sets. The ProSeal will cushion the plexi a bit, but the main
reason I use it here is to prevent canopy squeaks. Did I mention that it
also makes the canopy substantially stiffer?
 A homemade canopy edge rolling tool. Four rollers make it far superior to
a two roller model. The four rollers will help keep the unit straight so you
don't roll off the edge and make a unwanted crease.
A homemade canopy edge rolling tool. Four rollers make it far superior to
a two roller model. The four rollers will help keep the unit straight so you
don't roll off the edge and make a unwanted crease.
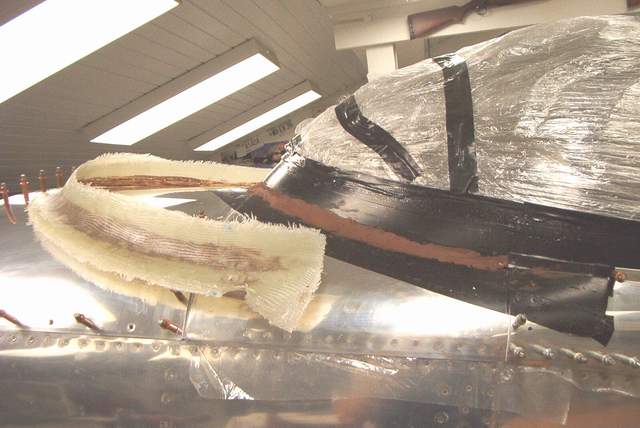
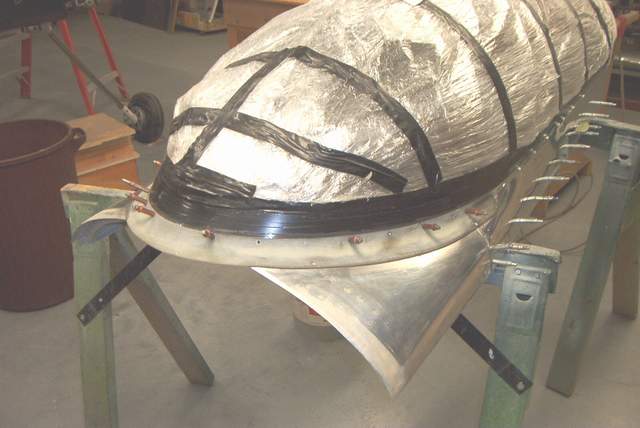
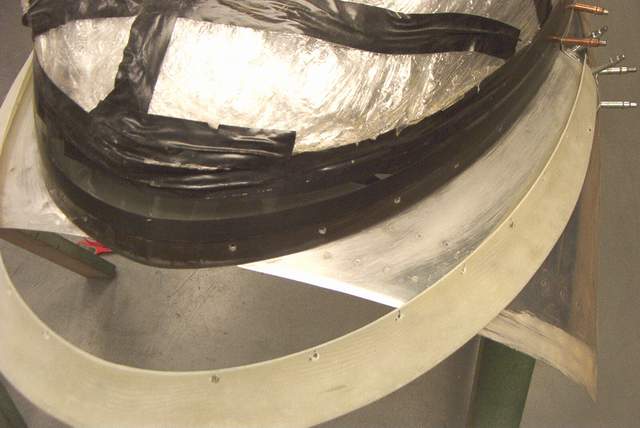
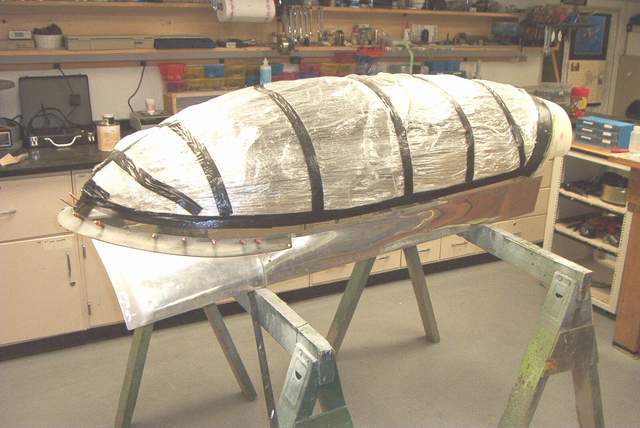
 4-7-03: The canopy skirts are a pain in the butt due
to the compound curves at the front. I got the metal as close as it would
reasonably get and then notched it. It all gets covered with the
fiberglass fairing that wraps around the front of the canopy.
4-7-03: The canopy skirts are a pain in the butt due
to the compound curves at the front. I got the metal as close as it would
reasonably get and then notched it. It all gets covered with the
fiberglass fairing that wraps around the front of the canopy.
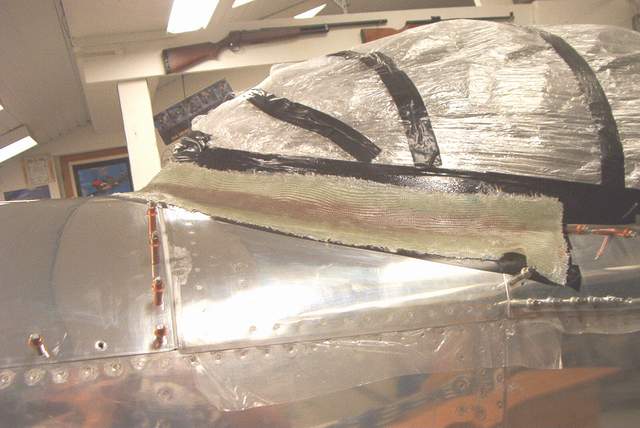
 4-14-03: I used x-ray film, which my wife gets from work,
to make a form for the rear canopy skirt. After some careful cutting and
taping, I glassed it with 4 layers of bid cloth. 3 layers would probably
have been enough. I can't believe that some people would be insane enough
to build an entire airplane from this sticky glop.
4-14-03: I used x-ray film, which my wife gets from work,
to make a form for the rear canopy skirt. After some careful cutting and
taping, I glassed it with 4 layers of bid cloth. 3 layers would probably
have been enough. I can't believe that some people would be insane enough
to build an entire airplane from this sticky glop.
 4-21-03: I used some art clay to model the front fairing.
Worked great.
4-21-03: I used some art clay to model the front fairing.
Worked great.
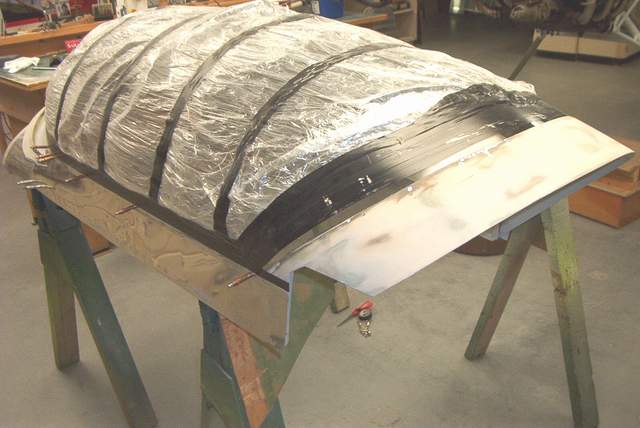
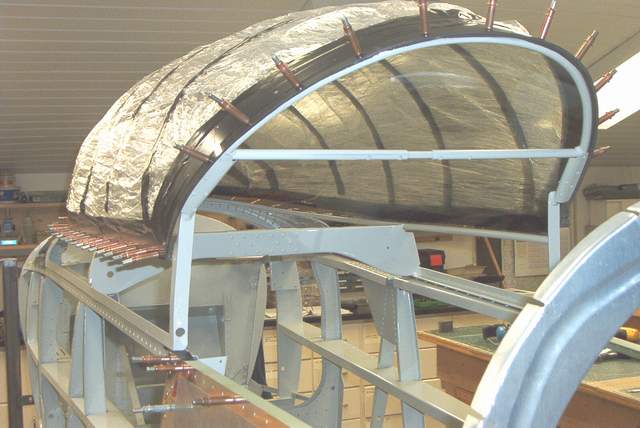
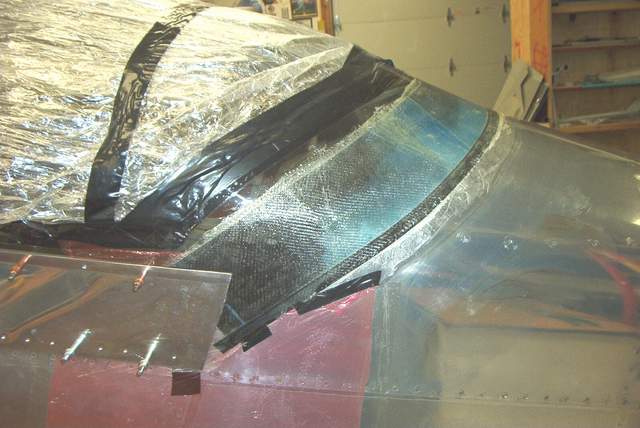
 September 2003: The rear skirt is filled with West System
410 microlight filler. It works quite well and is fairly easy to use.
The skirt has been ProSealed and riveted in place. Notice the tape to
protect the plexi.
September 2003: The rear skirt is filled with West System
410 microlight filler. It works quite well and is fairly easy to use.
The skirt has been ProSealed and riveted in place. Notice the tape to
protect the plexi.
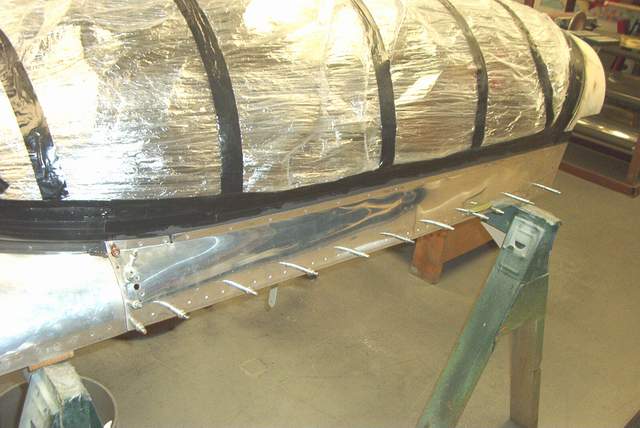
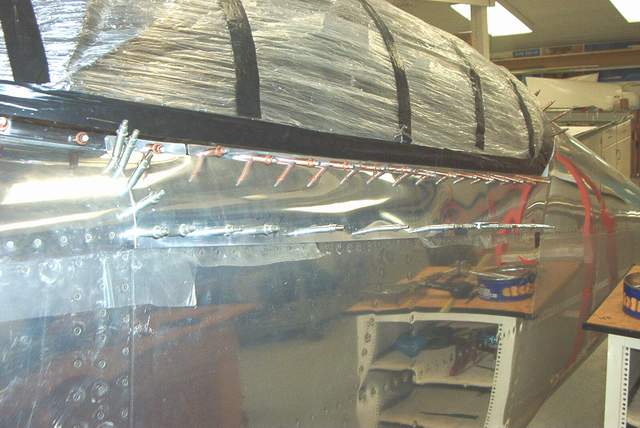
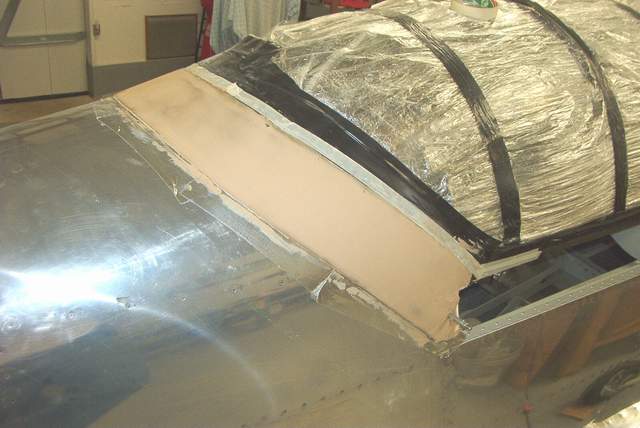
 September 2003: The side skirts are ProSealed and riveted
in place next. You'll need to mask off everywhere that you don't want
ProSeal. Then peel the tape when you're done with the Black Goo and marvel
at how nice it looks.
September 2003: The side skirts are ProSealed and riveted
in place next. You'll need to mask off everywhere that you don't want
ProSeal. Then peel the tape when you're done with the Black Goo and marvel
at how nice it looks.
I used Sherwin Williams Sunfire paint on the interior. The small amount of acetone required to clean off ProSeal smudges won't hurt it. Don't get the acetone on the plexi though.
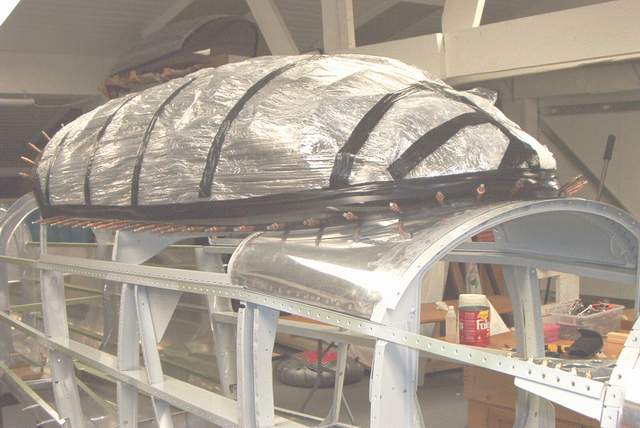
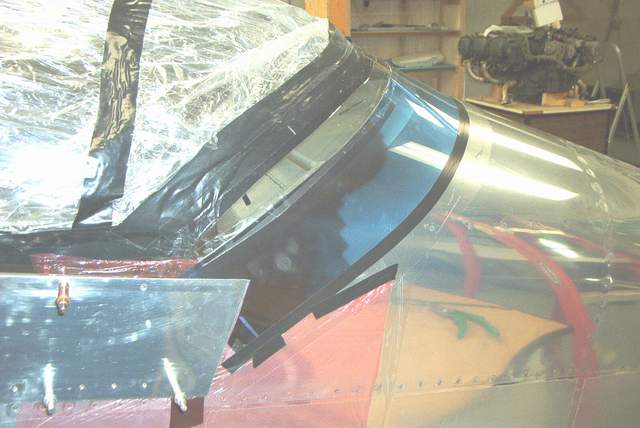
 September 2003: The front fairing also gets ProSealed and
riveted in place. Wow.... lookee there. Almost done with the canopy.
September 2003: The front fairing also gets ProSealed and
riveted in place. Wow.... lookee there. Almost done with the canopy.
 October 2003: The canopy is finished, except for a few
minor chores needed to complete the latch mechanism.
October 2003: The canopy is finished, except for a few
minor chores needed to complete the latch mechanism.

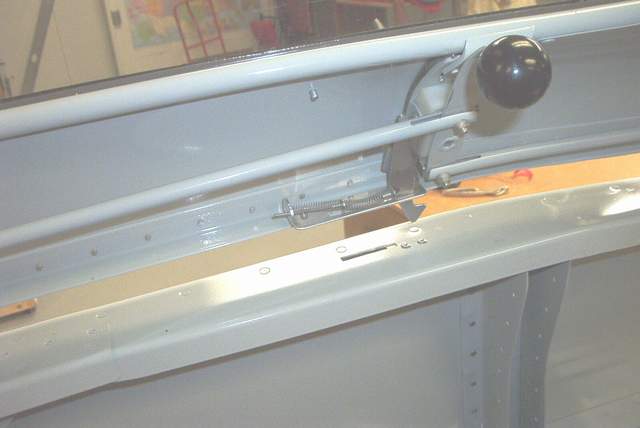


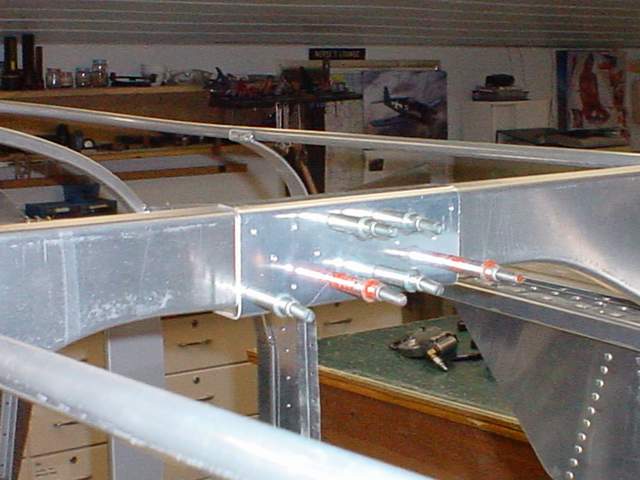
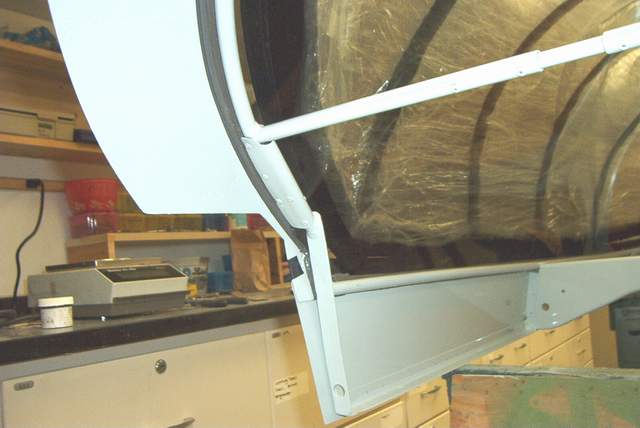
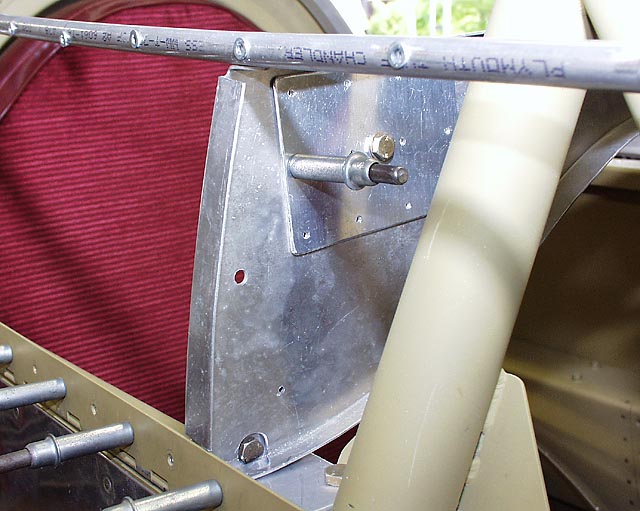
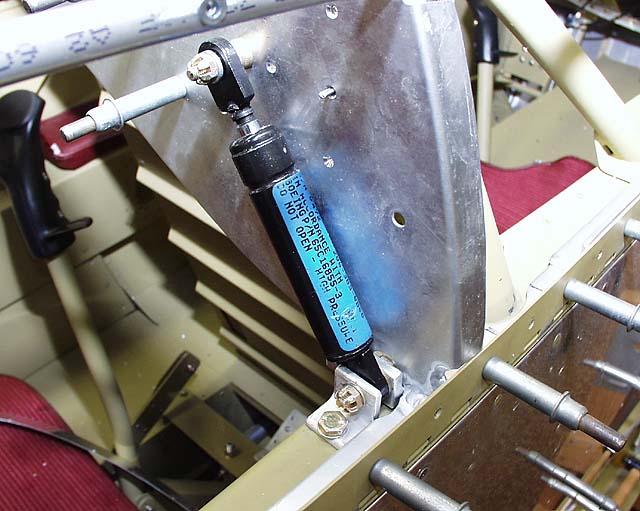
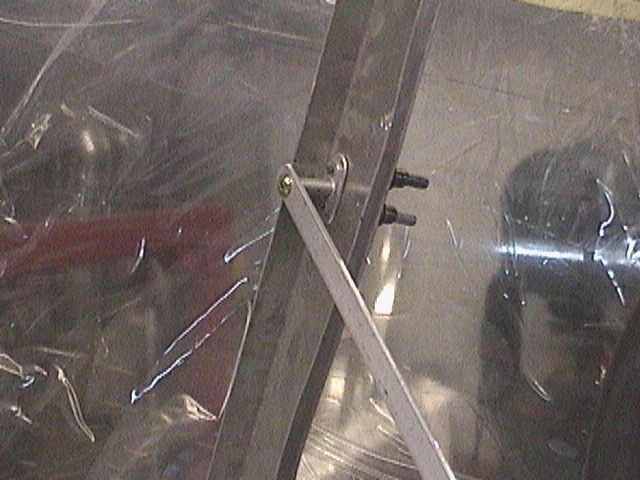
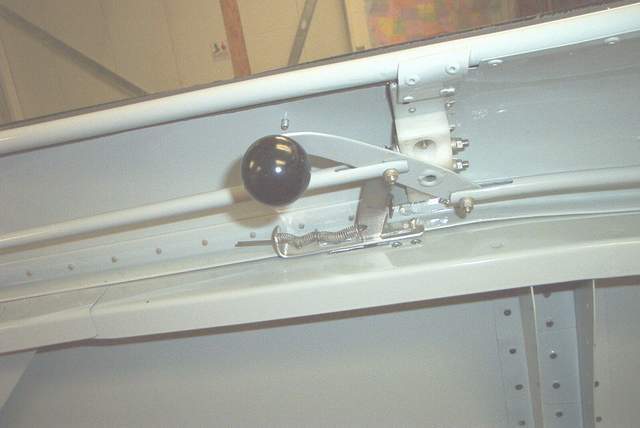 The latch mechanism and safety catch in action. They work fine. I would
recommend rotating the white nylon bushing block by 90 degrees, which is how
it's shown on my RV-4 plans. At the time I made my bushing block it seemed
like a good idea to support it on the thick bar behind it. However, this
orientation makes putting the bolts in the actuating tubes more difficult since
there are clearance problems. Doh!
The latch mechanism and safety catch in action. They work fine. I would
recommend rotating the white nylon bushing block by 90 degrees, which is how
it's shown on my RV-4 plans. At the time I made my bushing block it seemed
like a good idea to support it on the thick bar behind it. However, this
orientation makes putting the bolts in the actuating tubes more difficult since
there are clearance problems. Doh!
 Exterior view
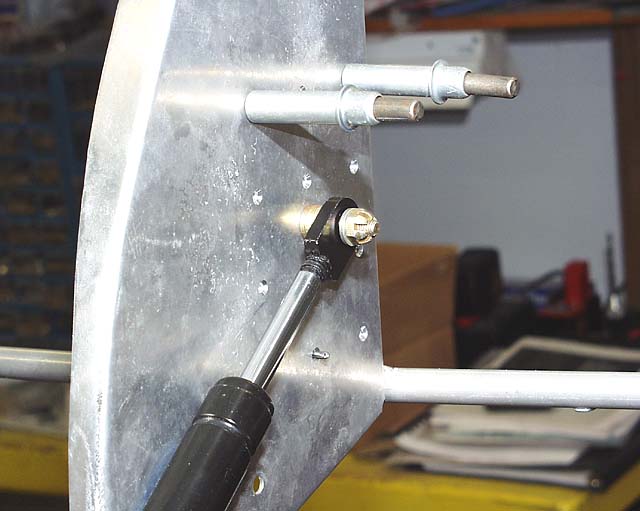
 The return spring shown here is kind of weak but will have to do for now.
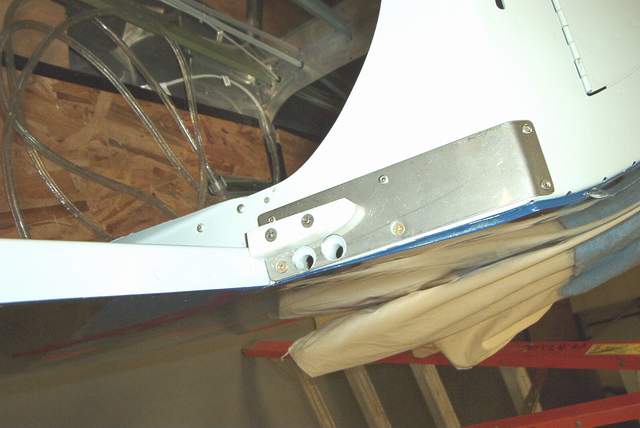
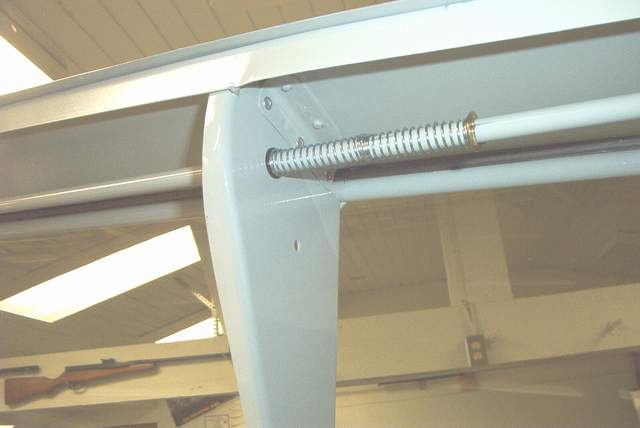
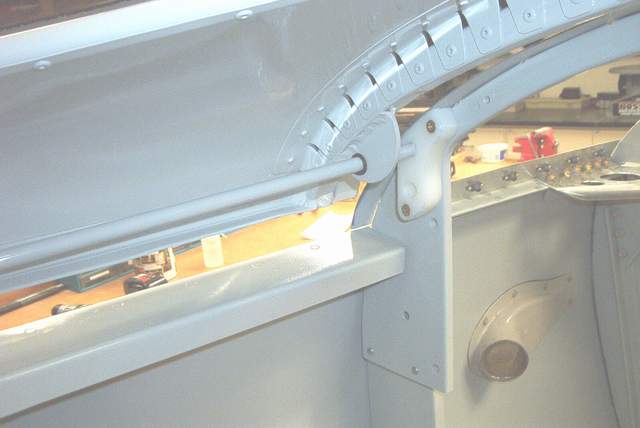
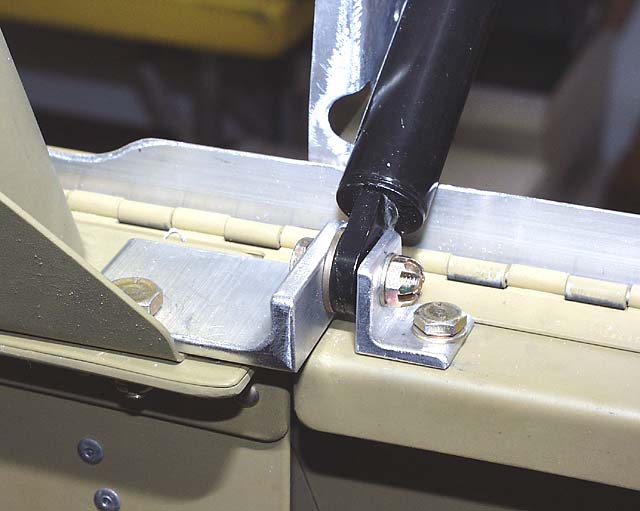
 The rear of the canopy needs to move outboard by a smidge to keep from scuffing
my paint. The nylon block on the fuselage hits the aluminum angle on the
canopy to do this. the large stainless steel scuff plate on the fuselage
keeps the actuating rod from scraping the paint.
The rear of the canopy needs to move outboard by a smidge to keep from scuffing
my paint. The nylon block on the fuselage hits the aluminum angle on the
canopy to do this. the large stainless steel scuff plate on the fuselage
keeps the actuating rod from scraping the paint.
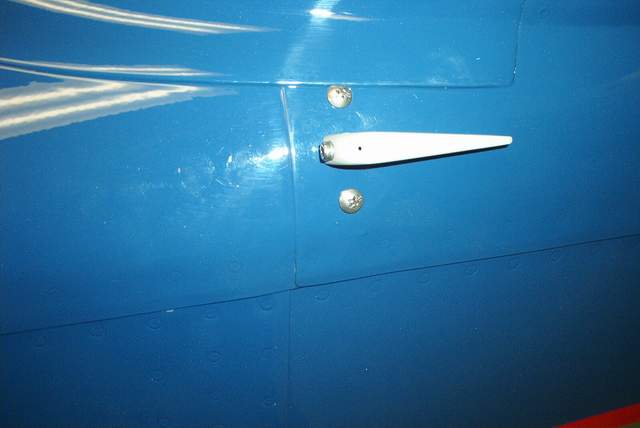
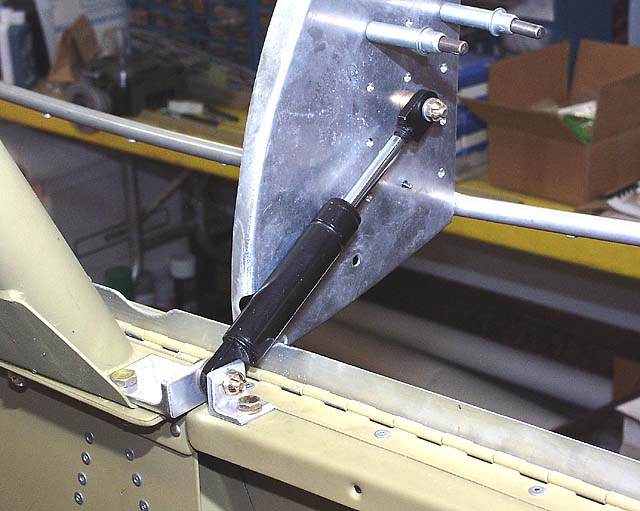
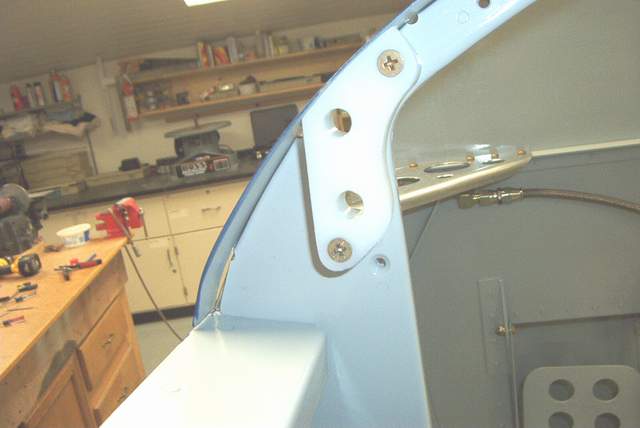 The front nylon block can be mounted in front of the instrument panel or behind.
I put mine in front to take up some of the excess space between the actuating
rod support on the canopy and the instrument panel. Otherwise my canopy
would have possibly been able to raise up a bit in flight.
The front nylon block can be mounted in front of the instrument panel or behind.
I put mine in front to take up some of the excess space between the actuating
rod support on the canopy and the instrument panel. Otherwise my canopy
would have possibly been able to raise up a bit in flight.
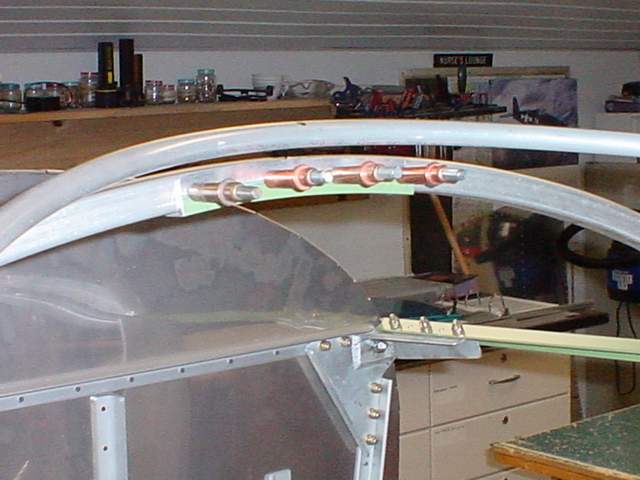
There are two holes... the top one is for the taxiing ventilation position. Vince
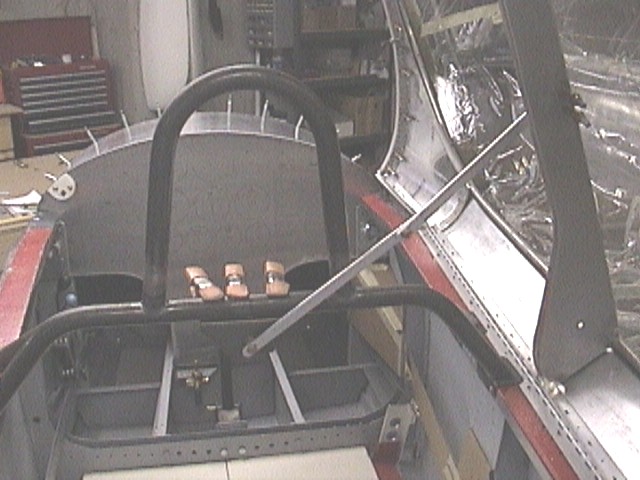


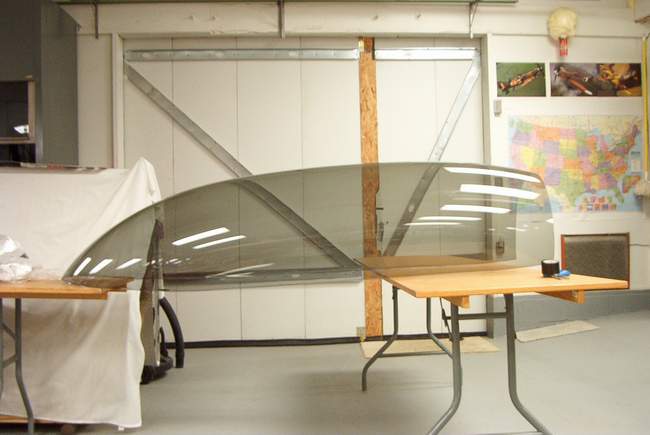
The photos above show a couple options to hold the canopy open. I like the scissor-like mechanism made from 2 bars of aluminum. That's what I used on my RV-4 and it worked well.
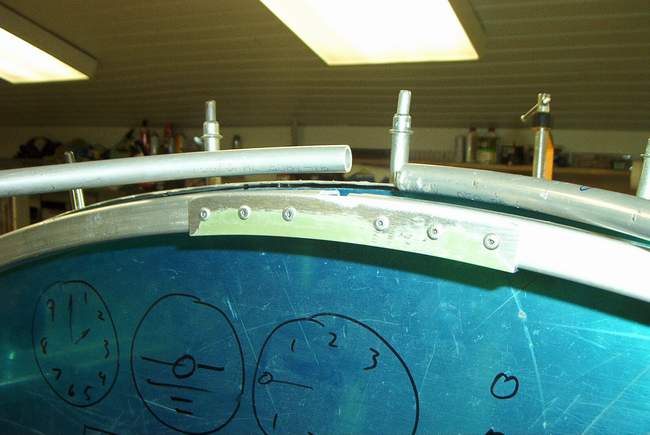
In the 5th photo above you can see a row of rivnuts in the canopy frame tubing. Many builders, including me, have regretted using rivnuts in this spot. If the rivnut breaks loose it can be quite a chore to fix. Some builders use JBWeld to glue them in to avoid that problem. Some builders use the rivnuts and then make the dreadful mistake of using locktite on them. Locktite can craze and ruin your canopy plexiglas. Don't risk it. On my RV-4, I used the pop rivets specified on Van's print and it worked fine.
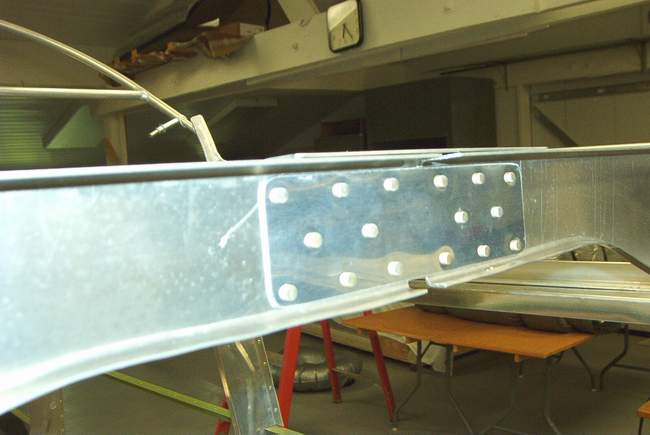
You'll notice that many Rockets have a splice in the canopy frame where the frame was widened slightly to match the fuselage.
It is probably a good idea for most builders to mount the canopy as high as possible to give adequate headroom for headsets, helmets, taller than expected pilots, etc... Vince Frazier


 Tom Martin's canopy
Return to the homepage: http://www.vincesrocket.com/
Last updated on: 09/01/2006
CAUTION: This web site is not a publication of, nor approved by, Harmon LLC, Team Rocket, Van's Aircraft or any other person or entity listed herein, except me. Be advised that I am a blithering idiot with neither brains nor money and my advice is not to be trusted. So there. You have been warned! Vince